The Artistic Process
-

Overview of Artistic Process
Photography with Reverence
As is most often true, where there is reverence, there is dedication. Film photography is no different. Each image takes a lot of time and effort to bring to life. A final print is often a result of weeks or even months worth of efforts.
The hours spent in the process are a labor of love, but they are also a labor. I will often hike ten miles with a forty pound kit without taking a single image, return to camp after an entire day out with only two sheets of exposed film, or end up getting washed out completely by too much rain for a wooden box with bellows to withstand. Film photography is painstaking in its detail, and is kind to those who are willing to learn through failures — it can be quite temperamental, uncertain at times, and downright frustrating at others. It also can be exhilarating, life giving — imbuing a sense of pride over the process and responsibility to the lands visited like no other medium I’ve encountered.
The one constant for me throughout the process is Nature’s everlasting beauty. The magic of our Earth, and our ability to cultivate a relationship with Her, is something that cannot be captured, so I work on being patient and compassionate along the process — remembering no image will ever turn out exactly as our soul sees it, or as our heart feels it, and that’s exactly how it is supposed to be.
-

Research & Planning
Planning Allows for Fluidity in the Field
It all starts with following where I feel most called. Different places reach out to me at different times — whether that be dictated by seasonal conditions (e.g., low fog in the Marin Headlands) or by a particular lesson I need to learn from the land at that moment (e.g., patience and humility in the Redwoods).
So, I listen. Then, I plan. I create detailed Field Guides that contain all of the technical and photographic information I need to know for a particular trip as well as a detailed itinerary for each day including the weather conditions, sunrise and sunset time, moon rise and moonset times, GPS coordinates, tide conditions, a breakdown of the photo locations for each day, length of hike required, overall time needed in the area, and driving distances between locations.
I review my archives, view other’s work of the area, study the land on Google Earth, monitor varying seasonal conditions, read through trail guides, review State and National Park websites, USDFA reports, and stay up to date on detailed meteorology reports. I do all of this so I can be fluid and prepared in the field — as the light shifts, or as the weather changes, I have my Field Guide and catalog of knowledge to turn to. Being prepared in this way allows me to let the environment and weather drive the photography.
-

Film & Camera Preparation
Kodak TMax 100 & Chamonix 45f-2
My film of choice is Kodak Professional TMax 100. After working with nearly every black and white film stock, I chose TMax 100 as it provides an extremely fine grain structure and high quality of sharpness for landscape images. The film has a wide dynamic range, handling high contrast scenes exceptionally well. It also requires one to slow down. At only 100 ASA, a typical exposure in the Redwoods can last for 9:30 minutes or 12:50 minutes when taking reciprocity failure into account.
Knowing my film stock and how it has responded in past settings is a crucial part to the image visualization process. It is from that knowledge I can begin to dream up how I want to capture a certain scene. In doing so, the visualization and weather are inextricably linked. Each inform the other. The visualization of images reminds me of my baseball days. Throughout games, I would close my eyes and visualize the opposing pitcher tipping his pitches by the way he held the seams of the ball, the difference between the spin of the slider and curve, or the ball skipping across the slick infield grass. I would see it. And feel it.
Visualization connects us to our intuition. It is in the visualization that the image unfolds. I have found communing with the land before taking any images, breathwork, silence, and prayer as helpful companions in the visualization process.
-
Arrival at Field Location
Immersing
Upon arrival, I find a location to tuck away from the trail and spend a fair amount of quiet time greeting the land. I feel into the energy of the environment. I will touch my knees to the soil, give thanks to the land, speak to the flora and fauna, and share my gratitude for all of the beauty, all of the wisdom. I offer tobacco to the land, asking permission to be there — a guest coming in reverence, peace, and love. My request is often answered by a hawk’s call or a rustling of leaves in a way I know I am welcomed.
I prefer to hike a number of miles before taking any images. It allows for the physical body to quiet the mind, to reach a meditative state and to more fully immerse myself into the wild. It is through hiking that I find timelessness, from which creativity is borne. While hiking, I am observing all that is around. I assess my initial photography plans, allowing the land and weather to dictate the day. Once I find a composition, I will sit with the land for a while before taking out my camera.
I have found that when you truly immerse yourself in the scene, you become part of it. Elk graze yards away, Bobcat accompanies you for an evening stroll on the bluffs, and Songbird sings in rhythm with your movements. It is a beautiful process. And if you are fortunate enough to make an image alongside it, you are able to time travel back to that memory, that calm, that wild moment where you were nothing more than a part of a larger, more beautiful story.
-
Making the Image
Create A System
I use several tools to assist in composing images. I have a small Viewfinder tool that provides a general frame for 4x5 compositions. I also have a Viewfinder app on my iPhone that applies frames for my different focal lengths to the scene. I use these tools to nail down the focal length and exact location of my composition.
I then build my camera. All of my camera equipment is color coordinated, packed in a logical manner in which one is to build the camera, and is governed by a system I’ve developed with experience. Create a system. It will become second nature. The camera body is mounted on top of the tripod and locked into place. The bellows are extended to the chosen lens length and the lens is inserted into the front of the camera along with the cable shutter release. Next comes the filter ring adapter and filter holder so that I can use any filters on the scene.
Focusing requires the use of a dark cloth that drapes over the camera. Under the cloth, I use a magnifying loupe to focus the image as precisely as possible. The image on the ground glass appears upside down. After focusing is set, I decide what filters to use and meter the scene with a Sekonic light meter. Once the exposure and aperture are determined, I load the film in film holders, remove the dark slide, press the cable shutter release, and then place the dark slide back into the film holder. The image has been made. I give thanks to the land.
-

Developing the Image
Kodak Xtol Replinished System
The negative now needs to be processed. This is where most photographers send in their film to have a professional lab develop the images. This makes sense when first starting out on your photography pursuits, but I discovered that processing my own images at home allows for the most amount of artistic control and results in the best production of negatives. This also means that you need to acquire the tools to develop the film, including the chemicals, storage containers, graduated cylinders, processing tanks, and other items.
Processing film is a repetitive task. It can be tedious and time consuming, but there is also a meditation and ownership over the process that is like few other experiences. The current processing tank I use can hold four sheets of film at a time. Each round of developing can take between 40-60 minutes from start to finish. On a good day, I process 24 images. I told you, a labor of love.
As for the actual process, if you are interested in learning step by step instructions, development times, information on creating a replinished system, etc. please get in touch with me. The film is loaded into the processing tank in a portable darkroom tent. Once the sheets are loaded, the developer is poured in and agitated at constant intervals. The film is then exposed to the stop bath, where development is halted. The film then goes into the fixer, which stabilizes the image, before being washed. After the initial wash, a round of Hypo Clearing Agent facilitates a quicker final wash. A wetting agent is then applied and the film is ready to hang to dry.
-

Scanning & Post-Processing Images
Film In A Digital World
Now that we have the processed negative, we need to transform it into a viewable image. In the digital age, this is often achieved through scanning and sharing the image via electronic methods. It can also be achieved by making a darkroom print by using an enlarger and photographic papers or film emulsions.
For now, I scan my images with an Epson v850 flatbed scanner. The Epson v850 can be used for dry or wet mounting scanning. The scanner produces high resolution .tif files between 400mb and 1gb in size. By using the scanner in conjunction with SilverFast SE Plus software, I am able to control how the negatives are scanned, the white and black points of the image, and other artistic decisions that are absent if one sends film into be scanned by a professional lab.
I then use Photoshop (almost exclusively) for post-processing my images. In general, the majority of time spent editing images is in the simple, yet time-consuming, task of removing dust. I will also use Photoshop to selectively adjust the highlights and shadows on each image as well as to dodge and burn certain parts of the images, a technique that is based on traditional darkroom processes. Each image is then stored electronically catalogued by date, location, camera settings, development times, and other pertinent archival information.
-
Printing the Image
The Final Step
Bringing life to an image is the final act in this performative ballet of patience and intention. Currently, I offer archival pigment prints of all images in the Galleries produced by renowned photographer, gallerist, and printmaker, Charles Anselmo of Point Reyes Printworks. Each print is carefully produced with archival pigment inks on Hahnemühle Photo Rag Baryta, 315 gsm paper. This paper is one of the most esteemed fine art photography papers in the world. Garnishing acclaim for its longevity and archival nature, this paper provides a pleasing contrast and a rich tonal representation that captures natural black and white scenes exceptionally well.
I am most excited, however, about making handmade prints via alternative print processes. I have built an exposure box and darkroom studio at home in order to start printing my images in Platinum Palladium. This historic print process combines two precious metals - platinum and palladium - to create some of the most refined and rare photographic prints in the world. Platinum Palladium prints are favored by art collectors due to their archival nature and beautiful tonal ranges. Please stay tuned.

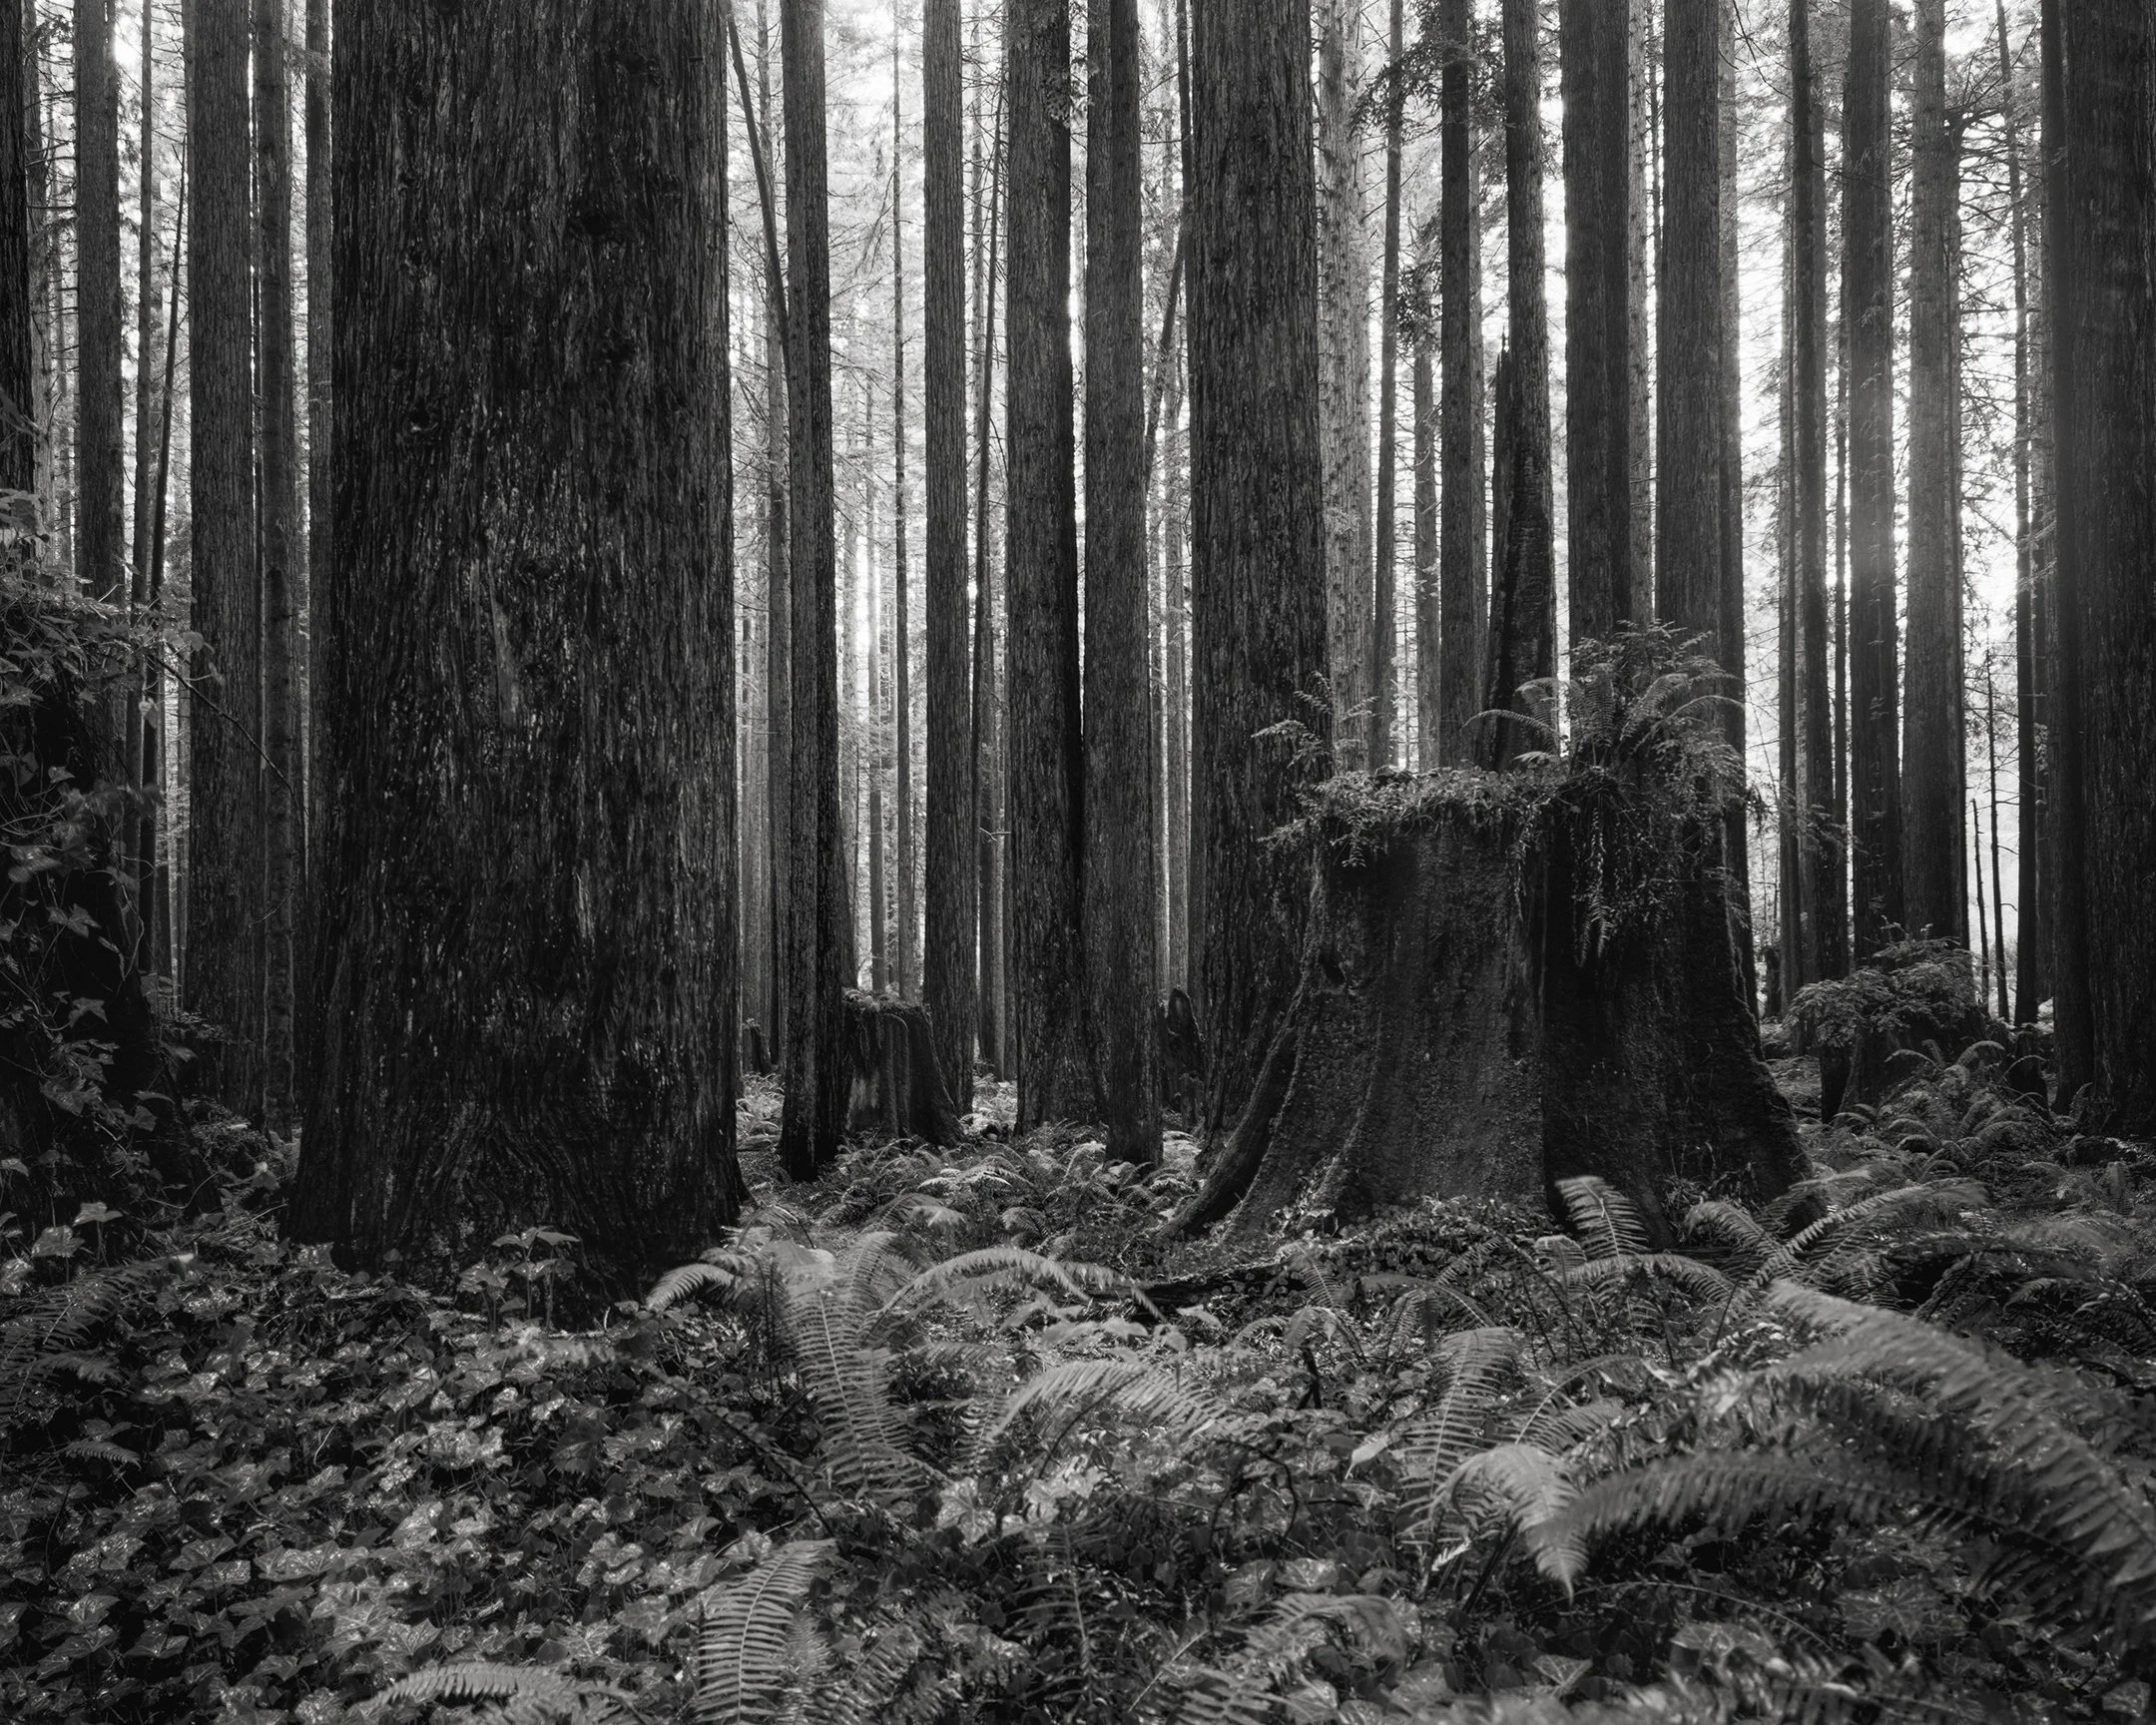
The Forest Invites You In
Land of the Tolowa, Yurok, Chilula, Wiyot, Karok | The Redwoods